How do I add a company logo to a payslip?
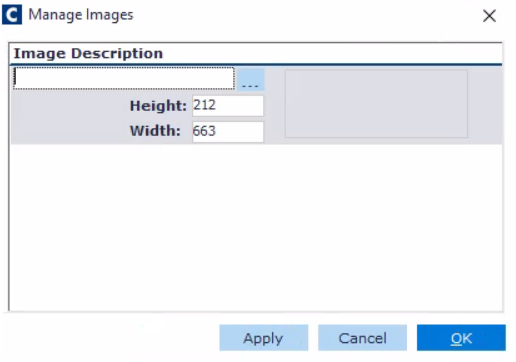
Go to: System Administration > Manage Images. The Manage Images window appears.
Right-click the Image Description pane and select New. The Image Description formats appear.
Click the three dots, and select the image you want to insert. The logo is displayed.
Note: You can only insert .bmp, gif, jpg or jpeg files.
Enter an Image Description.
Adjust the Height and Width, if necessary. Click the OK button. The logo is saved. And you are ready to insert the logo into the Custom Payslip Area/Payslip Logo > Logo tab window
Step 2. Insert the payslip logo.
All Payrolls: The logo selection affects all payrolls selected in the Content tab. ·
Each Payroll Separately: The Specific Payroll drop down list becomes active. Select the desired payroll.
Select the Logo tab.
From the Scope drop down list, select either of the following.
Select the Logo from the Select Logo Drop down list. The image appears.
Click the OK button. The logo is saved to the payslip. You are now ready to insert a message.
What are the default logo sizes?
Because the sizes of logos can be flexible, the maximum default sizes are:
companyLogo.png - 120 x 60 pixels
payslipLogo.png - 200 x 100 pixels