Cintra iQ Self-Service allows you to provide your employees with online access to your company's policy documentation.
Managing the policies is separated into two areas: Cintra iQ and Cintra Self-Service. You can set up the policy document's details in Cintra iQ and administer the policies in Self-Service. For more information, see the Policy Document check list.
Each time a new company policy document must be issued to your employees, the Documents in Self-Service module allows you to set up the policy's details to appear in the Self-Service interface along with the policy.
About the Document List window
Within the Document List window, you can perform the following:
Create a list of Documents.
Edit the details of a Document.
Delete a document from the Document List.
Go to Cintra iQ: Tools > Documents in Self-Service > Document List 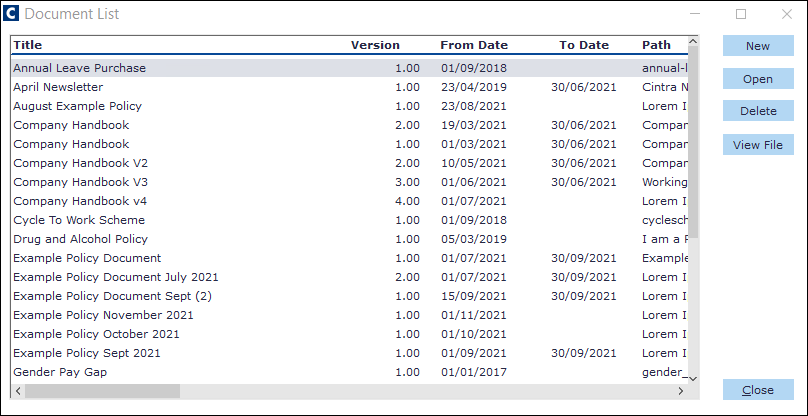
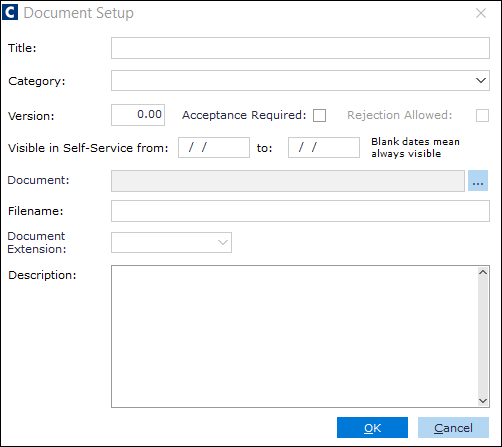
About the Document Setup window
Name | Description |
|---|---|
Title | The name of the policy. This title appears in the Self-Service Documents page. |
Category | A folder that contains documents with shared characteristics. |
Version | The version number of the policy. e.g. 111.01.
|
Acceptance Required | Check this to enable the Accept button on the document in Self-Service. |
Rejection Allowed | Check this to enable the Reject button on the document in Self-Service. |
Visible in Self-Service from | The date on which the policy document goes live. This field can be set in advance.
|
to Date | The date on which the policy document expires. Once the policy expires, it cannot be viewed in Self-Service.
|
Document | Use the browse button to locate the document you wish to upload into the Cintra iQ database. |
Filename | The name of the file. eg Internet policy |
Document Extension | The Filename's extension. |
Description | The purpose of the policy.
|
Once the document details are entered into the Cintra iQ Documents in the Self-Service module, you should send the electronic copies of the policies to your IT department who will upload them to the Self-Service web server in the following location:
<Self-Service installation folder>\Resources\Documents\This folder is created automatically upon installation.
About the Document Visibility window
You can assign one or more documents to a Self-Service role so that different employees can read different documents. e.g. Payroll users of Self-Service would need different policies to HR administrators. When the employee who has the role opens Policy Documents in Self-Service, they are able to read the document(s) when necessary. Within this window you can perform the following:
Select an Employment State.
Select a Self-Service Role.
Assign documents to the Self-Service Role.
Go to Cintra iQ: Tools > Documents in Self-Service > Document Visibility 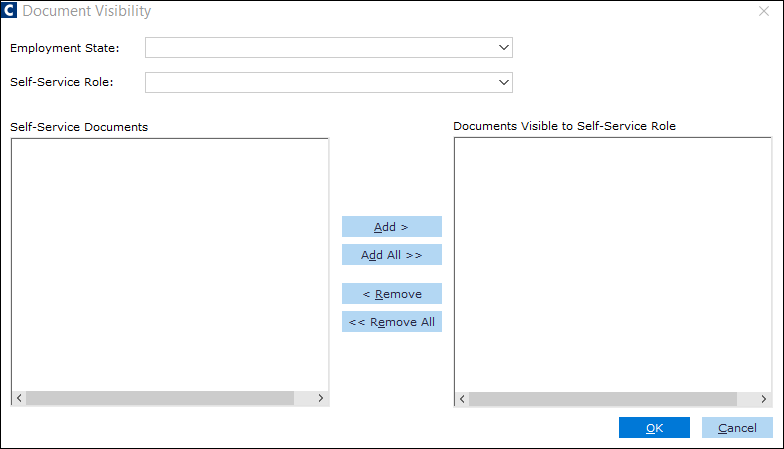
Name | Description |
|---|---|
Employment Status: | This drop down displays the state of employment to which the document is related: Employed, Grace Period, Post Employment, and Pre-Employment. |
Service Role: | This drop-down displays the list of Roles created in Self-Service > Edit Roles. |
Self-Service Documents pane: | This pane contains a list of the available documents. |
Documents Visible to Self-Service Role: | This pane contains the documents you wish to assign to a Role. They will be viewed in Self-Service > Policy Documents. |
More Information
How do I set up the policy's details?
Navigate to the Document List window.
Go to Cintra iQ: Tools > Documents in Self-Service > Document ListClick the New button. The Document Setup window appears.
Enter the document’s title.
Select the category to which the document belongs.
Enter a Version number.
Check the Acceptance Required check box, if necessary.
Check the Rejection Allowed check box, if necessary.
Enter a Visible from date.
Enter a Visible to date, if necessary.
Browse for the desired Document.
Enter a Filename.
Enter a Description.
Click the OK button. The document record is created.
Note: You can view the contents of the file by clicking the View File button.
How do I assign document's to self-service?
Navigate to the Document Visibility window.
Go to Cintra iQ: Tools > Documents in Self-Service > Document Visibility
Select the desired Employment Status.
Select the desired Self-Service Role. The associated documents appear in the Self-Service Documents pane.
Add the desired document to the Documents Visible to Self-Service Role pane.
You can also click Add All to make all documents available to the selected role.
Click the OK button. The documents are now visible to those Self-Service users who have the selected role.