How do I set up Authority to Recruit in Self-Service?
In order to access the Authority to Recruit functionality in Self-Service, ensure that the following are set up:
Login to Self-Service as Cintra.
Ensure that the Feature is licensed.
Go to Self-Service: Menu panel> Configuration> Web Features.
Locate the Authority to Recruit web feature.
Select the Licensed checkbox.
Click the Save Changes button. The Authority to Recruit functionality can now be added to the Feature Menu and Role.
Ensure that the Authority to Recruit menu panel is set up for both Self-Service user and approver. Login to Self-Service as Cintra.
For more information about creating direct access to Recruitment from the menu panel, see the Setting up Feature Menus guide.
Self-Service User
Navigate to Housekeeping> Feature Menu. The Feature Menu page appears.
If the desired web function is not licensed, then the feature will not appear in the Feature Menu Lookup table or in Roles.
Click the Add button for each menu type. The Feature Menu Item pop up appears.
Name | Description |
|---|---|
Menu: |
|
Menu Item: |
|
Self-Service Approver

Navigate to Housekeeping> Feature Menu. The Feature Menu page appears.
If the desired web function is not licensed, then the feature will not appear in the Feature Menu Lookup table or in Roles.
Navigate to the Management menu.
Click the Add button. The Feature Menu Item pop up appears.
Select Menu Type: Action.
Enter the Display Name.
Select the desired Lookup item: Authority to Recruit Approval.
Select Visible.
Click the Save button.
Place the item in the desired location under the Management menu.
Click the Save Changes button.
Ensure that the desired Roles contain the requisite web functions.
Login to Self-Service as user.admin.
Go to Self-Service: Menu panel> Users> User Admin> user.admin> Edit Roles.
Select the desired role.
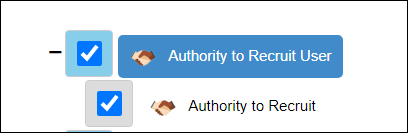
Transfer the desired Authority to Recruit functions from the Available Functions pane to the Functions in Role pane.
Click the Apply button to save the changes.
Continue to attach the Role to the desired user(s). The user is then able to request authority to recruit for an existing post or new post.
How do I use Authority to Recruit in Self-Service?
Both the employee (with managerial responsibilities) and manager have the ability to request to recruit a member of staff within Self-Service for an existing post or a new post. Once a request is approved in Self-Service, you can see its details in Cintra iQ.
Within Self-Service, as an employee (with managerial responsibilities), you can perform the following:
Create and edit an Authority to Recruit request for an existing post.
Create and edit an Authority to Recruit request for a new post.
Within Self-Service, as a manager, you can view and approve/reject an Authority to Recruit request.
Within Cintra iQ, as an HR administrator, you can view and edit an approved Authority to Recruit request.
For more information, see the following guides attached to this article.
Self-Service Authority to Recruit Employee's user guide.
Self-Service Authority to Recruit Manager's user guide.