Both the employee and manager have the ability to enter payment requests in a Timesheet, which can be determined by periodicity and group. The payment requests are known as Claims. The manager also has the ability to accept or reject claims and can add a claim on behalf of an employee. A claim contains the Payroll and/or HR information required in order for the employee to be paid. If the employee has a multi tiered managerial structure, all managers within the tier must accept the employee's claim before it can be submitted to Payroll for payment.
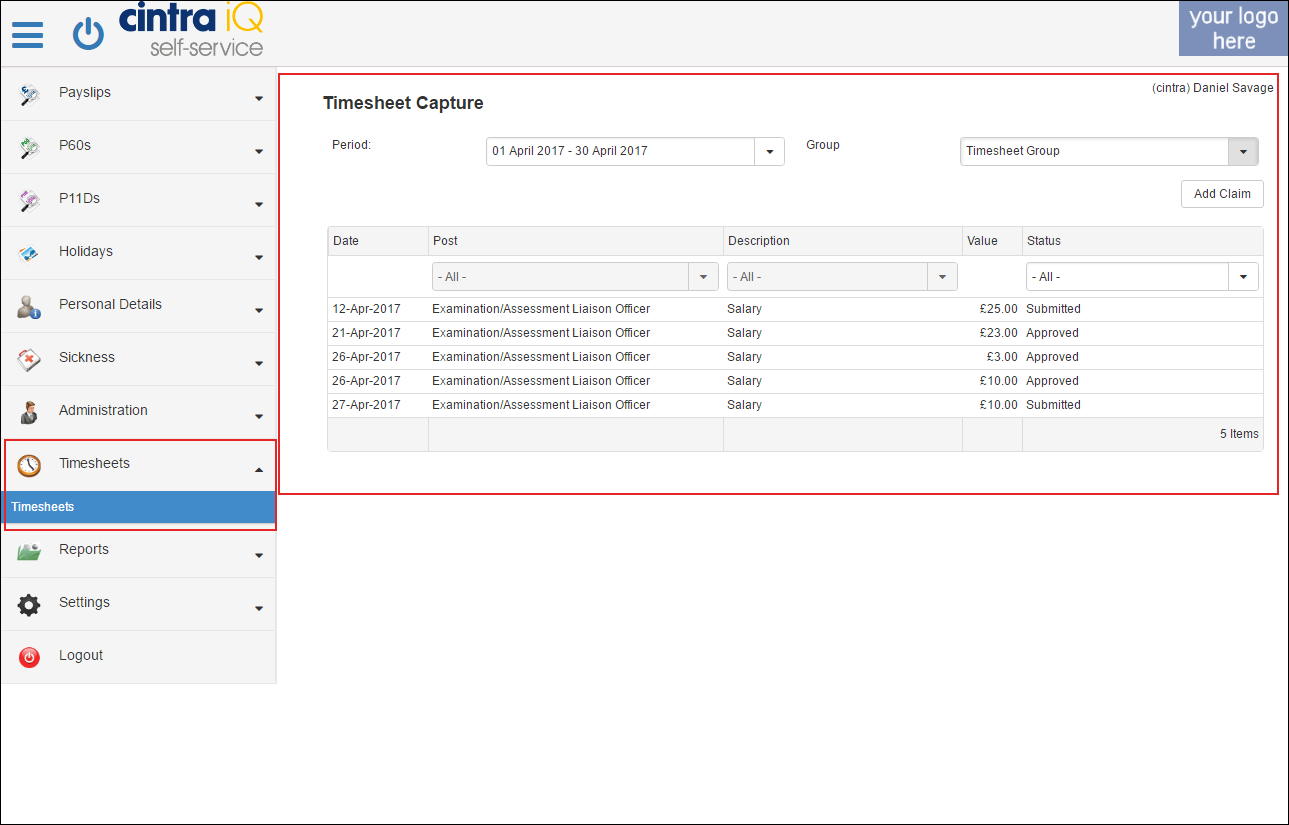
Sign in to Self-Service: Timesheets > Timesheets > Timesheet Capture. As an employee, you can fill in a timesheet claim within the Self-Service Timesheet module.
Timesheet Capture
 You can perform the following:
Add a new claim.
Filter data by Period or Group.
View current and historic claims.
Filter current and historic claims by:
Post: Where applicable. For example, Finance Director and IT Director.
Description: For example, Overtime, Basic Hours etc.
Status: For example, Approved, Pending, Submitted etc.
View the details of a claim.
Resubmit a claim for approval.
Delete a claim.
About Timesheet Capture
The following image contains pre existing claims.
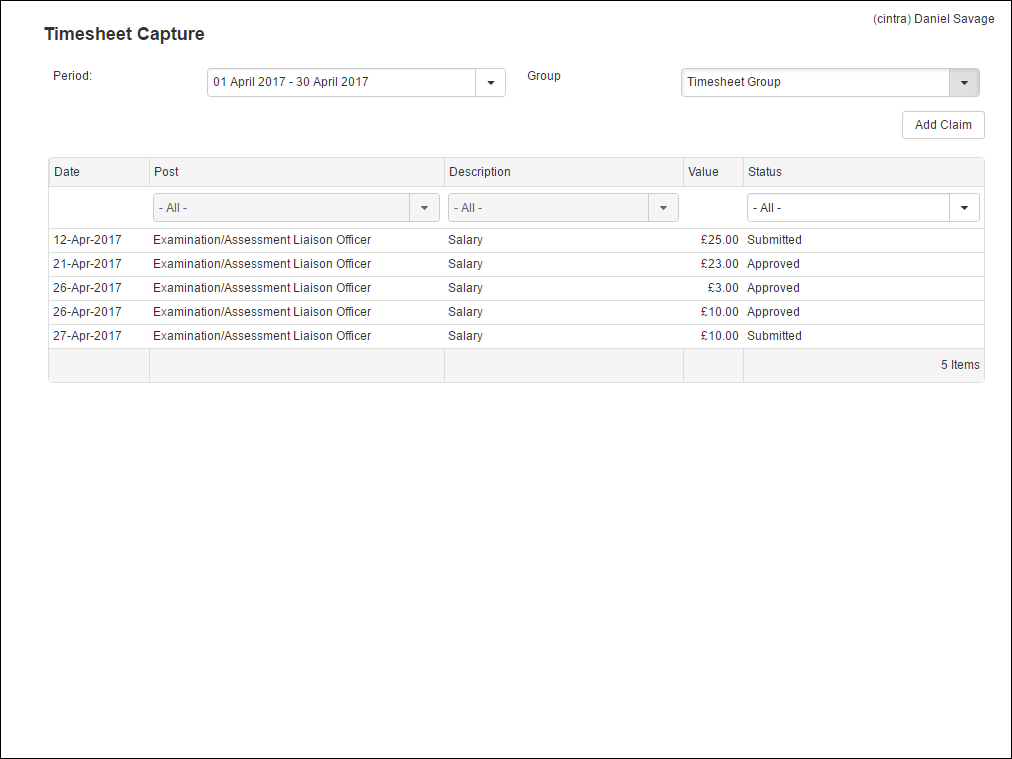 The Timesheet Capture tab contains the following fields:
Name | Description |
|---|---|
Period | The drop down list defaults to the most recent period and does not include future periods. The drop down list may include a number of historic periods, which are set in Cintra iQ's Timesheet module. |
**Group | **This drop down only appears if you belong to multiple Timesheet Groups. i.e. when the you hold multiple posts and those posts belong to different Timesheet Groups. Timesheet Groupsdefine the periodicity and date frames for claims as well as validation rules. They are configured by your system administrator in Cintra iQ Timesheets. |
Add Claim | Click this button to create a claim. |
Date | This column represents the date for which you make the claim. |
Post | This column displays the title of your post. If you have more than one post, you can filter the posts to view a particular claim |
Description | This column displays the Addition Heading name. e.g. Salary or Overtime. |
Value | This column can display monetary amounts and/or units, depending on which Addition Heading was chosen when the claim was filled in.An Addition Heading is a payment heading and affects Payroll.
|
Status | This column displays the status of the claim; whether it has been the following:Submitted: The claim has been submitted for approval.Approved: The claim is ready to be sent to Timesheet Claims by the manager.Rejected: The manager(s) has not accepted the request. Therefore the claim cannot be submitted to Payroll.Requires Costing: Depending on the set up in Cintra iQ Timesheets, either the you or the manager must enter a cost code.Requires Narrative: Depending on the set up in Cintra iQ Timesheets, either the you or the manager must enter a comment.Requires Reason: Depending on the set up in Cintra iQ Timesheets, either the you or the manager must enter a reason for the claim.Pending: This status appears in the employee's mode when the claim is approved and submitted to Payroll by the manager.Unapprovable: This status occurs when an employee has no line managers assigned to them.
|
* If these fields are not available to you, contact Cintra Support.
About the Claim Form
Sign in to Self-Service: Timesheets > Timesheets > Add Claim button
This is where you, as the employee, can fill in a claim (request for payment) for a particular post.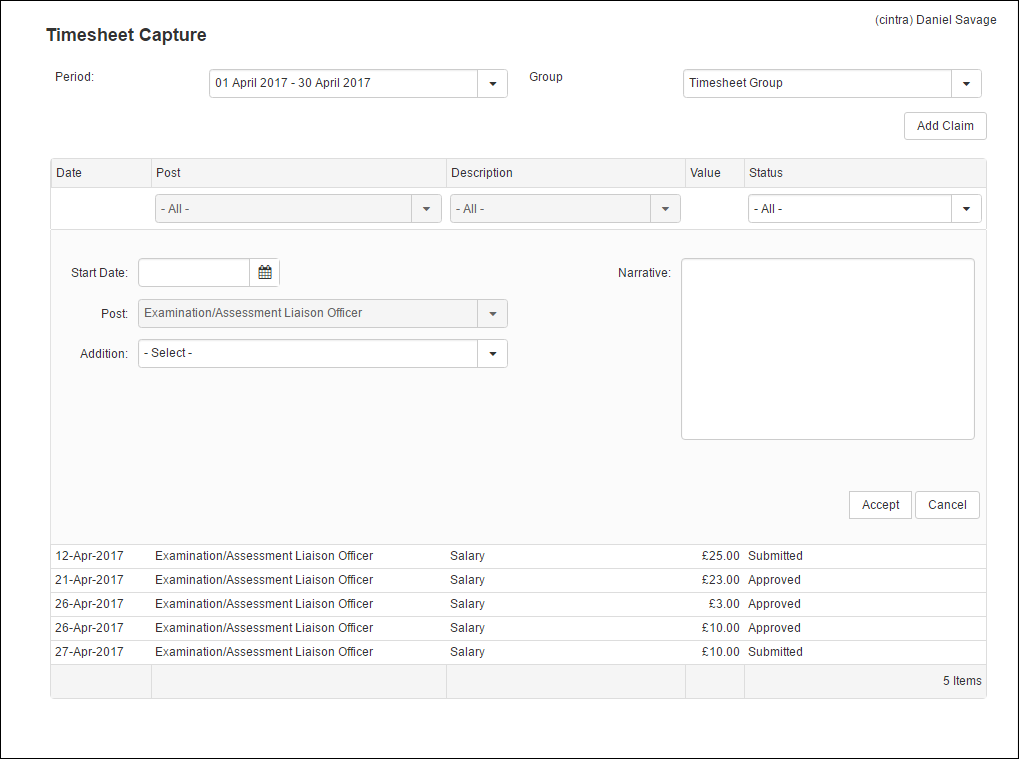 The Timesheet Claim form contains the following fields:
Name | Description |
|---|---|
Start Date | The Start Date pertains to the timesheet period. If the claim requires a date range, the End Date field becomes active. |
Post | This contains the title of your post. If you have more than one post, this is reflected in the drop down list so that you can assign the claim to the appropriate job. |
Addition | This contains the Addition Headings set in Cintra iQ's Payroll module.
|
**Amount | **Depending on the Addition Heading, this is displayed as Amounts, Units or Days etc. |
Narrative | This is where you can add comment about your claim. You may be requested to justify an expense or absence. Therefore, you need to add a comment in the Narrative box. This is displayed when the manager reviews your claim. |
Cost Codes | This is where you assign cost codes to the claim. These drop downs appear, depending on the Addition Heading selected. Consult your Cintra Implementation team for more information. |
Accept | Click this button to save the information and send the claim to your manager(s) to be approved and sent on to Payroll. The claim then appears in the your current/historical claims list. |
Cancel | Click this button to hide the Claim form and return to the current/historical claims list.
|
About the Claim Form's Details
Sign in to Self-Service: Timesheet > Timesheet > Timesheet Capture tab> Claim
Once a claim is created, you, as the employee, can view its details by clicking it in the current/historical claims list.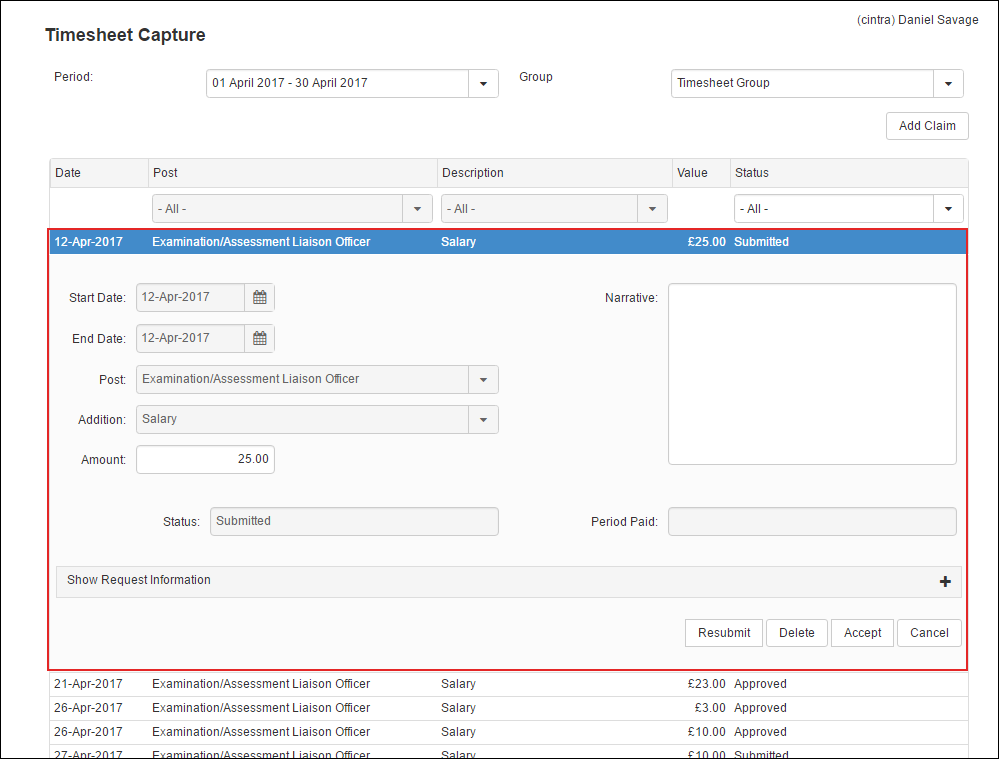 The Timesheet Claim form contains the following fields:
Name | Description |
|---|---|
Start Date / End Date | The Start Date pertains to the timesheet period.
|
Start Time / Stop Time | The times at which the employee starts / stops work |
Break (Unpaid time) | If the employee has taken a break which is not paid, you can record its duration. |
Post | This contains the title of your post. If you have more than one post, this is reflected in the drop down list so that you can assign the claim to the appropriate job. |
Addition | This contains the Addition Headings set in Cintra iQ's Payroll module.
|
**Amount | **Depending on the Addition Heading, this is displayed as Amounts, Units or Days etc. |
Narrative | This is where you add comments about your claim. As an employee, you may be requested to justify an expense or absence. Therefore you need to a comment in the Narrative box. This will be displayed when the manager reviews your claim. |
Cost Codes | This is where you assign cost codes to the claim.
|
Accept | Click this button to save the information and send the claim to your manager(s) to be approved and sent on to Payroll. The claim then appears in your current/historical claims list. |
Status | This displays the status of the claim. i.e. Submitted, Pending, etc. |
Period Paid | This displays the pay period in which the claim is paid. The period is formatted by Taxyear/Payroll Period/Payroll. e.g. 2016/02 Cintra Salaried |
Approval box | This contains the names of the managers who are assigned to approve your claim. It details who has either approved or rejected the claim , if the claim has been either approved or rejected, any comments they have made and the date in which the decision was performed.
|
**Resubmit | Click this button to reset the approval associated to the claim so that the manager(s) must approve it again.
|
Delete | This deletes the claim automatically from the current/historical claims list. |
Accept | Click this button to send the claim to be approved by the manager(s).
|
Cancel | Click this button to hide the Claim form and return to the current/historical claims list.
|