Expenses provides a two-way integration with QuickBooks Online. We import key setup information from QuickBooks into your Expenses organisation, and once expenses have completed the approval process, you can export them into QuickBooks as either credit card expenses or vendor bills (for reimbursements).
This guide explains how to connect Expenses to QuickBooks, how the sync works, and what must be configured before exporting expenses.
Connecting QuickBooks
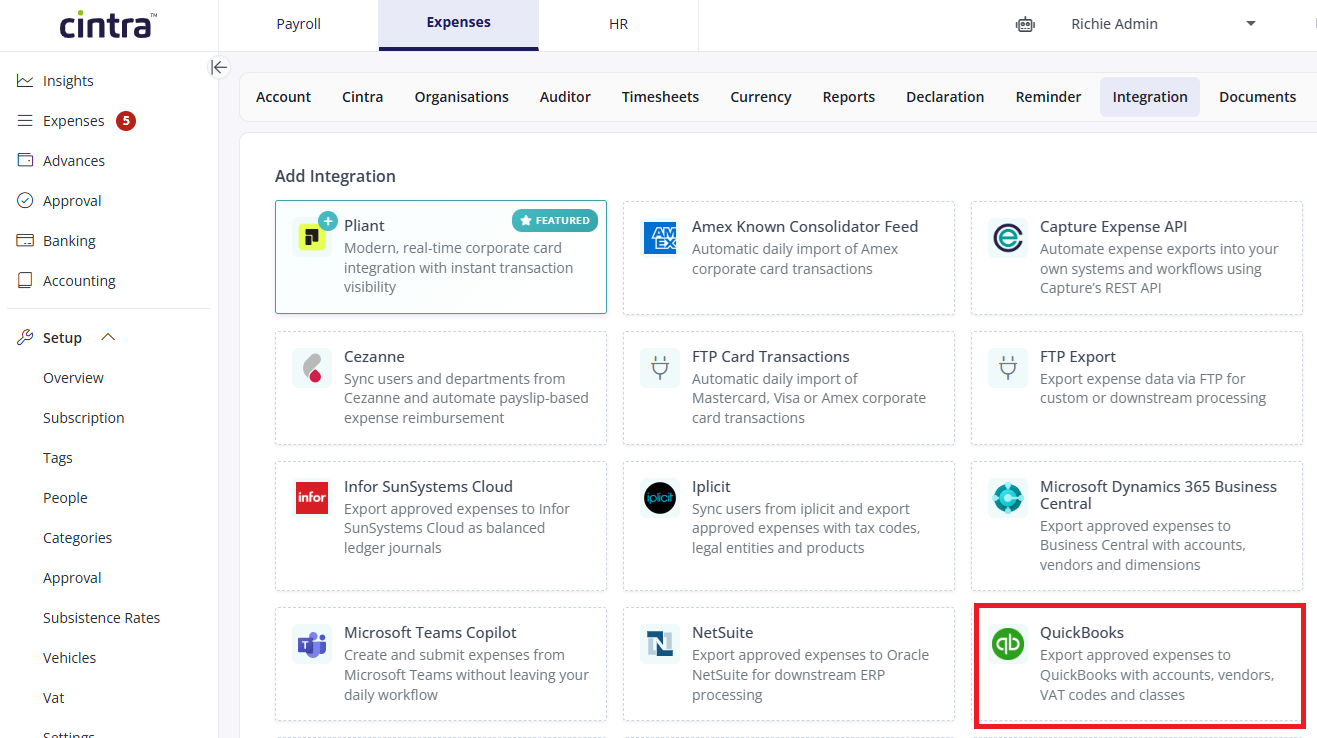
Go to Setup > Settings > Integrations tab > QuickBooks.
Click Connect to QuickBooks.
.png)
A pop-up will appear asking you to authorise your QuickBooks organisation.
Select the correct QuickBooks company and approve the connection.
.png)
Once authorisation is complete, you will automatically return to Expenses and see QuickBooks listed as a connected integration.
Fetching Records from QuickBooks (Initial Sync)
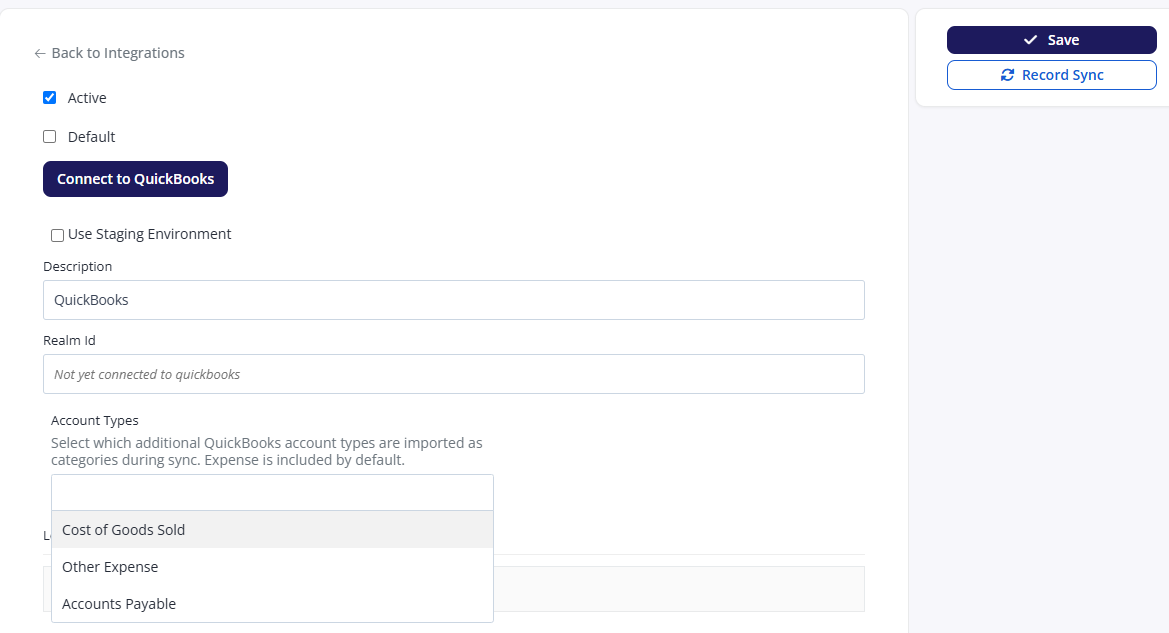
Open the QuickBooks integration and select Record Sync on the right-hand side.
Expenses will import the following:
VAT / Tax codes
Expense GL accounts
Classes (imported as Tags in Expenses)
Your sync results will appear in the activity log beneath the section.
.png)
Note: You can repeat this sync at any time if you add or update items in QuickBooks.
People (Syncing and Mapping)
To prepare your people records for exporting expenses to QuickBooks:
Go to Setup > People.
On the menu on the right, click Actions > Sync Suppliers.
Running Sync People will attempt to match Expenses people records with QuickBooks Vendors by comparing email addresses.
If an Expenses person has the same email address as a Vendor in QuickBooks, Expenses will automatically associate that record with the matching vendor.
You can verify this by editing a person in Setup → People and scrolling to the QuickBooks Supplier field, where the matched vendor will appear.
.png)
In addition to the vendor link, if a person will be submitting credit card expenses, you must manually assign the correct QuickBooks Credit Card Account on their record, as this connection cannot be matched via email and is not part of the automated sync process.
VAT / Tax Records
Your QuickBooks VAT / Tax codes can be viewed in your VAT rate list within Expenses.
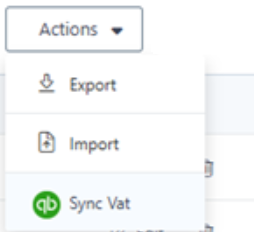
Go to Setup > VAT / Tax.
If new VAT / Tax codes are created in QuickBooks, select Actions > Sync VAT to pull the latest records into Expenses.
Categories
Your QuickBooks expense GL accounts will appear in Expenses as Expense Categories under Setup > Categories.
All expenses intended for QuickBooks export must use a category imported from QuickBooks. You can re-sync categories at any time using Actions > Sync Categories.
Recommendation: QuickBooks should be treated as the single source of truth. Always create new GL expense accounts in QuickBooks first, then sync into Expenses .
Tags (QuickBooks Classes)
If your organisation uses Classes in QuickBooks, these will be imported into Expenses as Tags. Tags allow you to categorise expenses in Expenses in the same way you report them in QuickBooks.
Once synced, you will see the class Tags available in Expenses . They can be applied in two ways:
Assigned to a Person
This is the simplest approach when a person normally sits under the same class, for example a department they belong to.
.png)
Selected on an Expense
This is helpful when the class may need to be different for each expense or different to the person’s usual class.
To allow this, open the Tag settings and turn on "Allow edit on expense". Once enabled, the Tag field will appear on the expense form so the user can choose the correct class when submitting it.
How the class is chosen when exporting
When Expenses exports expenses to QuickBooks, the class value will be added to the expense using this order:
If a class Tag was selected on the expense, that value will be exported
If no class was chosen on the expense, Expenses will then use the class assigned to the person
If neither is available, no class will be applied
This gives you flexibility for organisations where class allocation can vary by person, by transaction, or both.
If you don’t use Classes in QuickBooks, you can ignore Tags.
Exporting Expenses to QuickBooks
Once expenses have been created, fully approved, and have reached the Accounting area in Expenses , they are ready to be exported to QuickBooks.
Before exporting, make sure the following has been set correctly on each expense:
A category that has come from QuickBooks has been used.
If VAT applies, a QuickBooks VAT code has been selected.
The person submitting the expense is linked to a Vendor if it is a reimbursement.
The person is linked to a Credit Card Account if it is a credit card transaction.
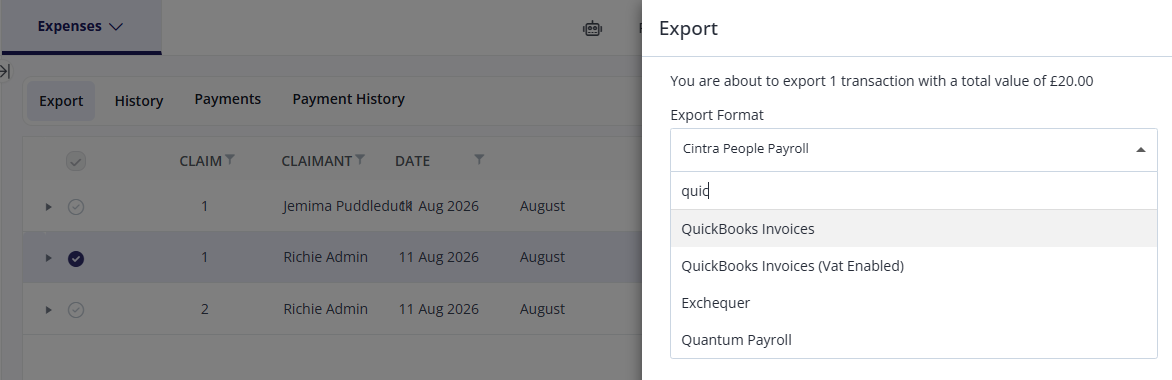
When everything is ready, go to the Accounting screen, choose the expenses you want to send, click Export, and select QuickBooks from the export options.
.png)
What happens in QuickBooks
Reimbursement claims will be created as Bills against the linked Vendor.
Credit card expenses will be created as Expenses against the linked credit card account.
Any receipt attachments will also be included in the export.
.png)
We strongly recommend that QuickBooks remains the master source for configuration such as VAT codes and expense categories.
Any new categories or VAT codes should be added in QuickBooks first, then synced into Expenses before they are used on expenses.