Once an Absence Analysis definition has been created, an "Extract" is produced. This is a set of data for a defined time period that is stored for future retrieval when you want to run a report on attendance over that period.
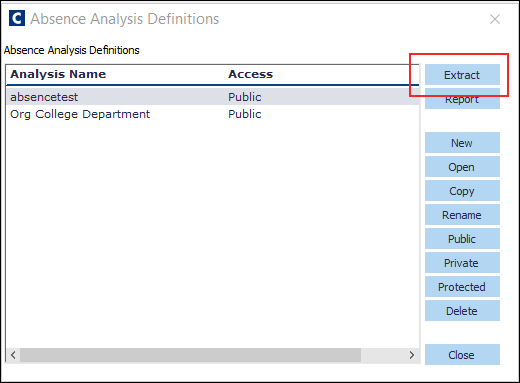
Go to: Tools > Absence Reporting > Absence Analysis. The Absence Analysis Definition window appears.
Select the relevant Absence Analysis definition.
Click the Extract button. The Absence Analysis Extract window appears.
Select the relevant period.
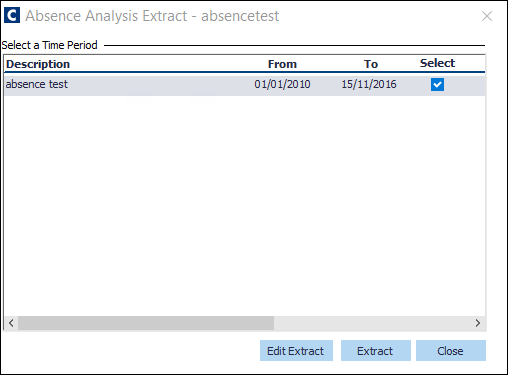
Click the Extract button.
If it is not the first time the Extract has been run, a warning appears stating: See Overlapping Data below for more information.
Continue to save the Extract as a .pdf file or click the OK button to exit.
If you need to edit the Extract, click OK to save the changes.
Overlapping Data
If it is not the first time the Extract has been run, a warning appears stating:
Warning: Data has already been extracted for [date]. Do you want to continue? (By doing so, you will overwrite the existing extracted data.)
If you hit Yes, The Absence Analysis - Edit Extract Data window appears.
As an extract is a 'snapshot' of data at the time it is taken, there may be additional absence data not included in the existing extract. Always consider if you need to refresh an extract in this way, or your analysis may not contain all the relevant data.
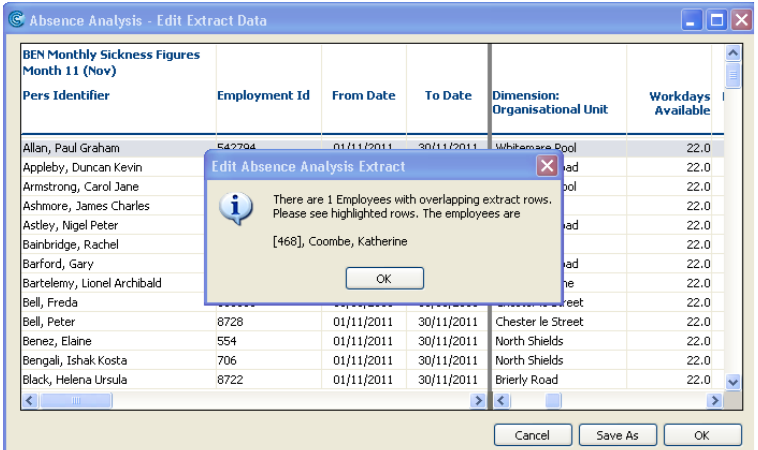
The message indicates that an employee has overlapping extract rows. This means that the employee belongs to two different ‘dimensions’ within the time period of the extract. If this message appears, find the highlighted row/s:
Example: Katherine Coombe has two rows, one shows an Organisational Unit of Easington Lane, the other is Cramlington. This is because Katherine holds two posts, in different Org Units. The problem here is that the Extract does not know how to allocate the person's absence between the two Org Units, and the figures are doubled up.
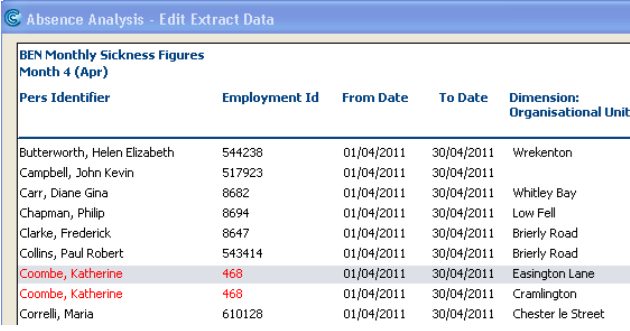
To solve this problem you can edit these rows, and either re-assign absence figures between the rows (for example, you may want to split it between the two Org Units, or delete one row, leaving the absence attributed to only one of the Org Units.
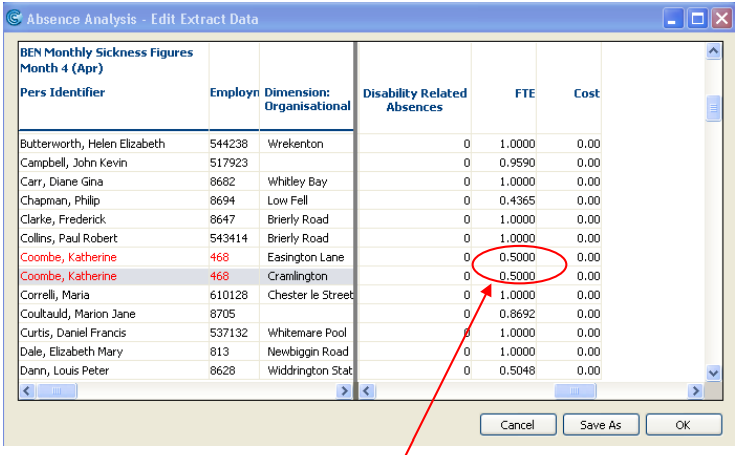
Here you can see the FTE has been split evenly between the two Organisation Units. You can resize the columns by dragging column lines at the top (ensure you have "Show Stack Grids" enabled, in the View menu), and move the split bar by clicking on it at the bottom, where the scroll bars are.
You will see a split-drag mouse icon: ... if you hover the mouse in-between the chevrons of the scroll bars. Click and drag right or left when you see this icon.
Any other relevant data that needs it, can be re-assigned in the same way. Click "OK" when you're finished, to save the changes to the Extract.