Cintra iQ allows you to create and manage your own reports from within the Cintra iQ system. Once created, the reports are then available at the bottom right of Cintra iQ and can be used whenever required.
A listing report produces multiple rows of data per employee, and its filter can apply to either records and/or data. For the other report type, see Creating and running payroll reports.
Go to Cintra iQ:
Lower right-hand corner > Reports > Reports window
Menu bar > Definitions > Reporting > Reports > Reports window
Listing report: definition and example
Listing reports produce a list of all the data selected when the report is created.
For example: to see a report on every period of sickness an employee has had, you can create a Listing report definition to show all periods of sickness belonging to that employment record.
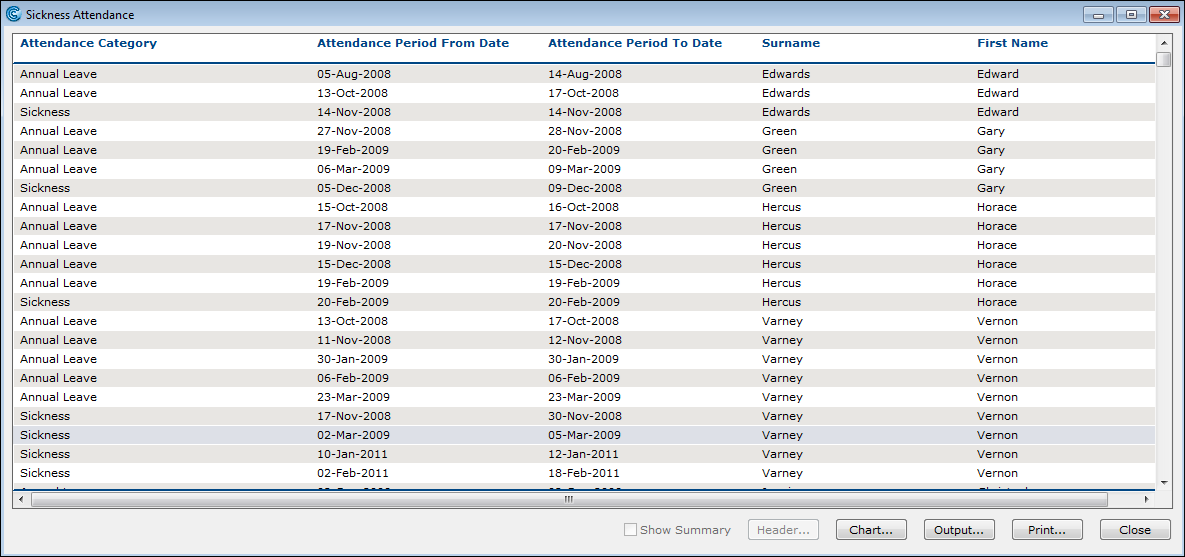
When creating the Listing report definition, you can:
Assign the data on which to base the report.
Format individual columns (optional).
Sort columns (optional).
Format printing options (optional).
Filter by record and data.
For the steps to assign data to the report, see Assigning data to the listing or payroll report.
Generating/running a listing report
Navigate to the Reports window.
Highlight a Listing report.
Click the Run button. The Filter Historic Records window appears.
Select either the All, As At, or Between criteria to Filter Historic Records. The Filter details are displayed below the selection, for your review.
Click the OK button. The report is generated.
Continue to process the report's output.
You can embed a filter in the Listing report to include or exclude data when the report is run. The system will search for records that contain the Fieldname data but not show the actual data unless it is already selected in the Listing Definition tab.
For example: I want to filter all the employees in the Department Headcount report who have a next of kin. Once the report is generated, I can go into the Contact Information form of the employee's personnel record to check the next of kin.
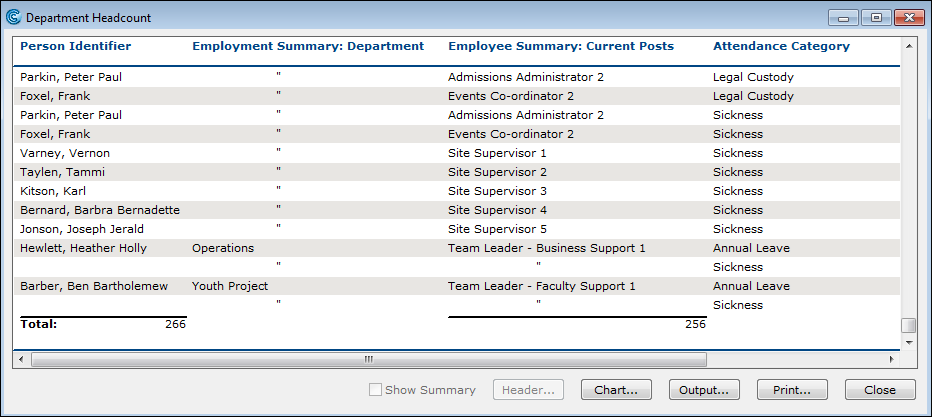
Note: Before you begin, turn off any filters that have already been applied to the report. Because, if a record filter is embedded in the report, it overrides any record filter that is already applied to the Navigator.
To embed a record filter
From the Available Filters pane in the Record Filters tab, select the desired filter.
These filters were already created in the Filters module. For more information, see Filters.
Add it to either the Include records belonging to All of: or Exclude records belonging to ANY of: panes.
Click the OK button. The filter is now saved and embedded. It will activate when the report is run.