Note: If your organisation doesn't use positions, this step in the new/edit employee screen will not be available. Depending on your system setup, not all the fields described below may be available to you.
If you are adding a new employee, positions are added in the Position details tab.
If you are editing an employee, positions are found in the Employment & position and Working patterns tabs.
Each employee should be assigned one or more positions which are used to determine salary, work patterns, contracted hours, etc.
When you add or edit a position, each position has the following information:

Position ID: Select an ID from the list. The Position and Job Title fields will be completed automatically. If you don’t know which Position ID to pick, speak to your Bureau / Cintra iQ administrator.
Start date (editing employee only): This defaults to the start date specified in the Employment details tab, but can be changed.
End date (editing employees only): If the employee is no longer in the position, enter the date they finished.
Additional role? In some public sector and education payrolls, different pension arrangements apply to a role, depending on whether the role is the primary one or an additional one.

Uses pay spine? A pay spine defines a salary structure in an organisation and contains multiple pay grades, each with multiple spine points. If you select Yes:
Spine Point Salary Paid As: Select whether the spine point salary is paid as salary, hourly salary, or extra time.
Grade/Spine Point: Select the employee's current pay grade for this position. Selecting a grade will change the spine points.
Auto Increment (editing employees only): Select Yes if the employee can move to the next spine point (and salary) automatically.
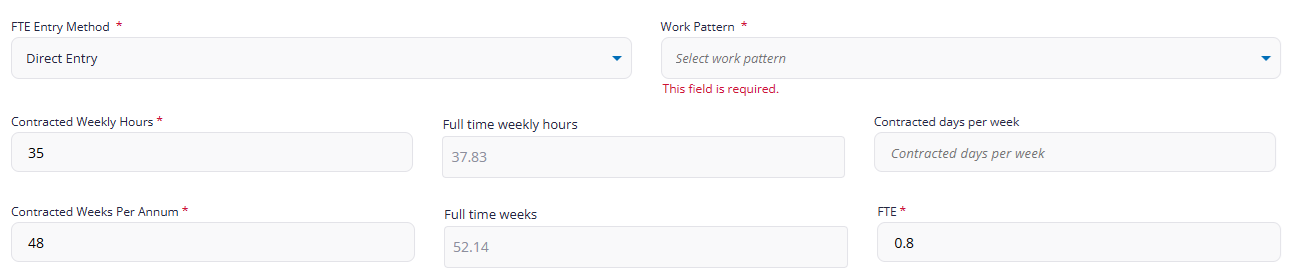
FTE Entry Method: If the employee doesn't follow standard working hours and you need to enter their FTE manually, select Direct entry, otherwise select Based upon contract hours.
FTE is used to calculate accurate salary and leave, particularly for employees who don't work full time.
Work Pattern: If you're not sure which working pattern this employee will be following, speak to your Bureau or Cintra iQ administrator.
Contracted weekly hours: This figure is used to calculate the FTE.
Full time weekly hours / Full time weeks: These are taken from the position and cannot be edited directly.
Contracted days per week: This figure is used to calculate the FTE
Contracted weeks per annum: This figure is used to calculate the FTE.
FTE: If you selected Direct entry above, select the FTE factor (between 0 and 1). Otherwise, this will display the FTE using the formula below:

Click Add Position to assign further positions to the employee.